

There will come a time when you need to be able to fix an underexposed photo.
Whether you underexposed your photo intentionally, or it was a simple in-camera error, it’s important to know how to adjust exposure in post-processing.
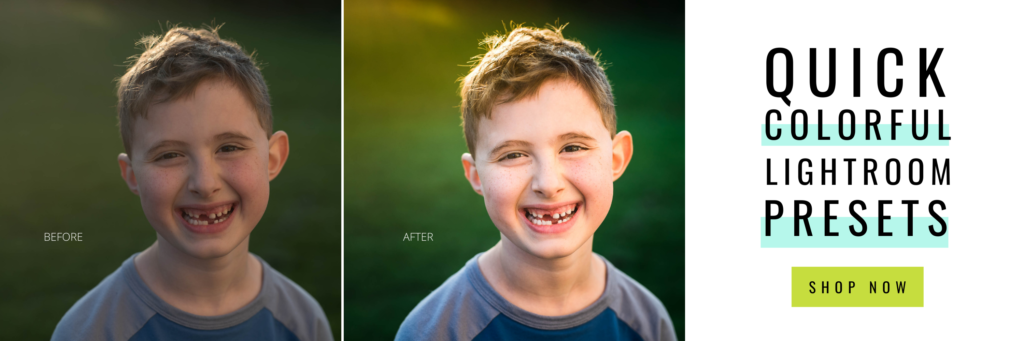
The easiest way you can do this is by shooting in RAW and using a program such as Lightroom to adjust the exposure.
Why shoot in RAW?
Without going on a tangent, RAW photos are better suited for this as they aren’t a final image such as a JPEG.
You can make more “mistakes” with a RAW image and it will be a lot more forgiving when you go to edit – especially when you need to fix an underexposed photo.
Working with RAW files makes the editing process easier and the photo quality better, so it’s an overall positive experience just by shooting in RAW.
However, this post isn’t to argue about RAW vs. JPEG. You can come to your own conclusions after reading this.
Intentional or unintentional underexposed photos?
Taking a dark, underexposed photo might be a simple, user mistake that only needs fixed on occasion.
Yet, there are photographers (such as myself), that choose to shoot underexposed ON PURPOSE.
Say what?!?!
Create a “BAD” photo….INTENTIONALLY? That’s right!
Intentionally underexposing your photos can provide a few key benefits to the final outcome of your photos.
For one, underexposing helps capture more details of a photo; details that can be brought back in post-processing, especially when shooting in RAW.
But, if you don’t shoot in RAW, this could be a disaster.
If you are shooting in JPEG, DO NOT intentionally underexpose your images, here’s why.
Secondly, when you retain more details, more of your editing can be flexible.
For instance, it’s easier to ADD LIGHT back into a photo than it is to take it away. This is the exact process that I use to create creamy skin tones in my portraits and how the light looks more pleasing to my subjects.
If you are starting with an overexposed photo, it’s harder to adjust because of the LACK OF DETAIL.
So, shooting a little bit dark is OKAY if you know how to fix an underexposed photo.
It’s all a balance of your camera settings, lighting, and shooting style to make it work.
In this tutorial, I am going to show you 4 ways to correct and enhance an underexposed image in Lightroom to make it stand out and look it’s best.
Watch the video below or keep on scrolling to read the written version of this tutorial.
The Lightroom Histogram
The histogram is a chart that shows the data from your camera that was recorded in your image.
It shows you how much of your image consists of highlights, shadows, and mid tones.
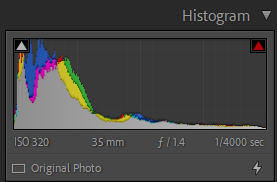
In theory, you want a histogram that doesn’t include very many highlights or complete shadows (100% black). But seeing how photography is subjective, I am not going to lecture you on this.
However, it’s a nifty tool to help show you your photo’s data in a more specific way.
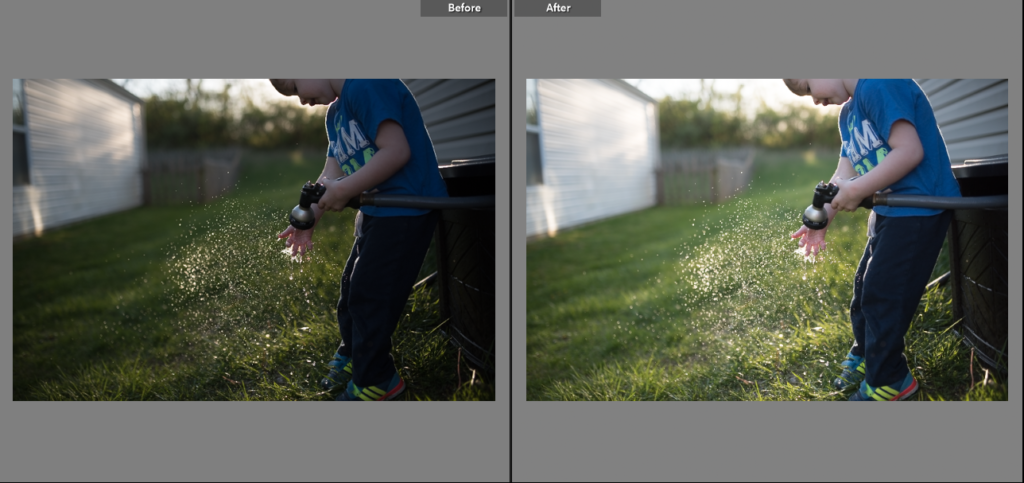
In Lightroom, the histogram can be used to reference that data or it can be used to adjust the data.
In addition to referencing the data, you can also adjust the histogram by simply clicking and dragging it. This is one way you can fix an underexposed image, but it’s not my preferred method.
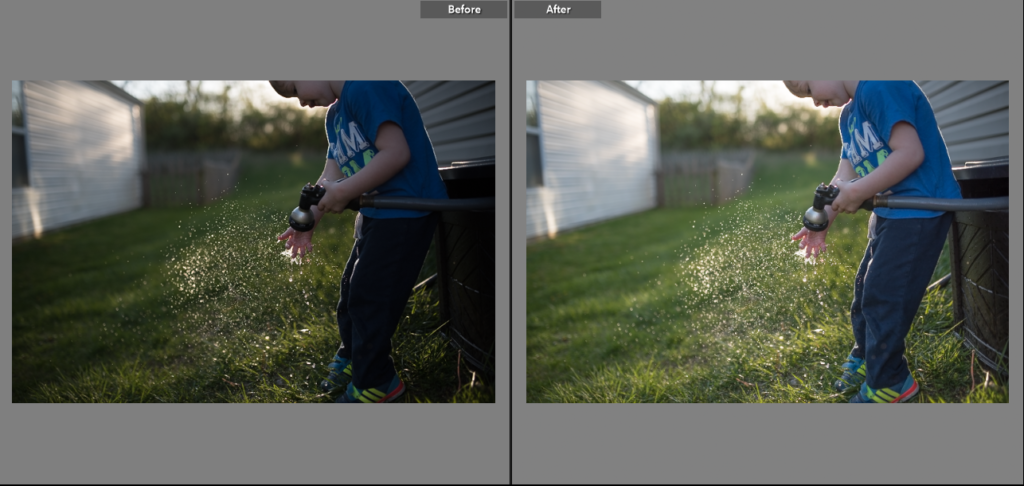
As you can see in this example, when the histogram was adjusted, it just shifted the shadows and flattened them (ahem, completely decreased them, which isn’t ideal) .
It’s a neat tool to have, but there are better methods to fixing an underexposed photo in Lightroom.
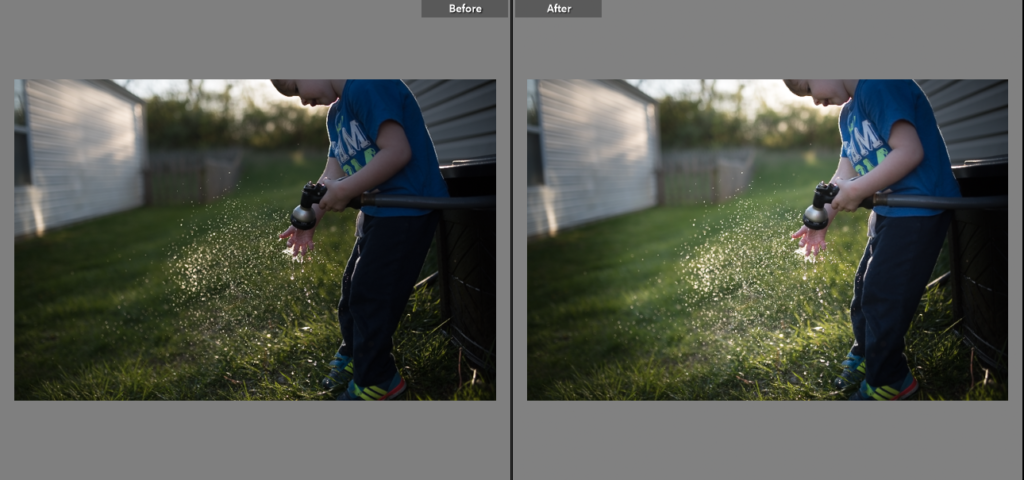
The exposure slider
Ahh, the most obvious solution. Let’s take a look at the exposure slider!
What I love about this slider (besides it’s extreme simplicity) is that it doesn’t change or alter the shadows and the highlights like the histogram method does.
Instead, it just brings up the exposure the same way you would do so in your camera.
So, it doesn’t flatten out the details near as much (if you had a dynamic range of shadows and highlights to begin with). It just brings all of the those parts of the photo “up.”
As you can see in this example, the photo just looks brighter.
It doesn’t get muddied like the histogram method, and there’s more dynamic range of midtones, highlights, and shadows.
As a whole, this method is better as a one-step method, but there are still a few ways you can fix an underexposed photo in Lightroom.
The Lightroom Tone curve
Another way that you can fix an underexposed photo in Lightroom is by adjusting the tone curve.
By adding various points on the curve, you can help your photo take just about any shape that you want – including exposure.
First of all, make sure that you have it set as “point curve” (the open white circle icon above the tone curve).
Now you can add points to the curve and move them to adjust the exposure and the overall look of your image.
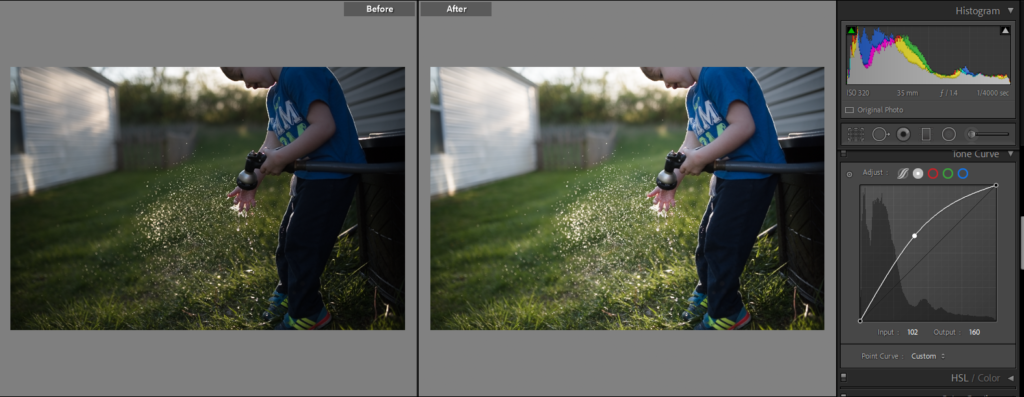
My favorite way to start is by putting down a pinpoint in the middle of the curve and pulling straight up. This will only adjust the mid tones and keep an overall dynamic look to your photo.
From there, you can add other points to bright down highlights, emphasize shadows, and create a totally unique look to your photos.
If you use presets to edit, just take note that adjusting your exposure this was MIGHT offset your preset adjustments (as you cannot layer and stack presets).
But, it doesn’t end here.
You can fix an underexposed photo in more ways.
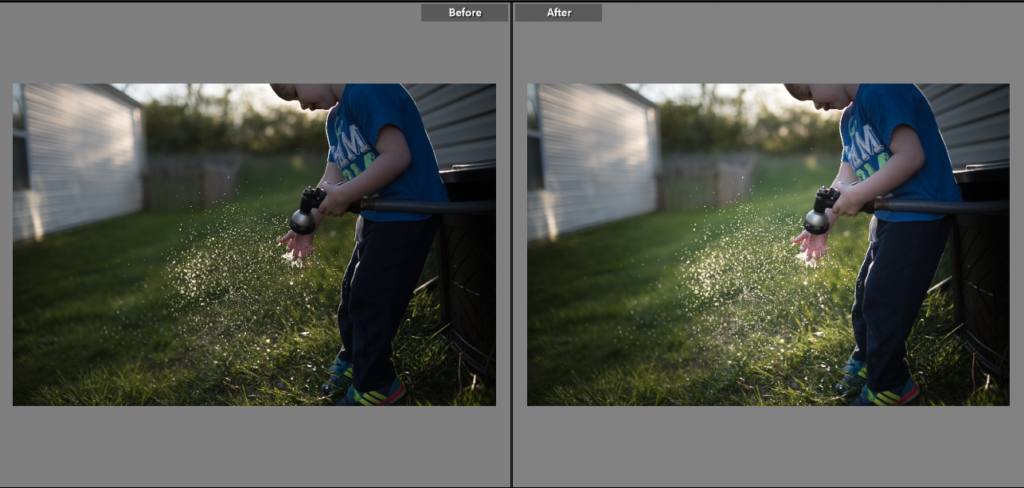
Use brushes and filters
If none of the above methods are working to your liking, you can adjust exposure using brushes and filters.
This is a great route to go if you only want to fix a part of your photo.
With brushes, you can be VERY specific where you want the exposure to to adjusted.
Filters on the other hand, aren’t as specific, but can be adjusted to only provide coverage over a certain area of your photo.
These are the best options if you want to over complete and total control over adjusting your underexposed photos.
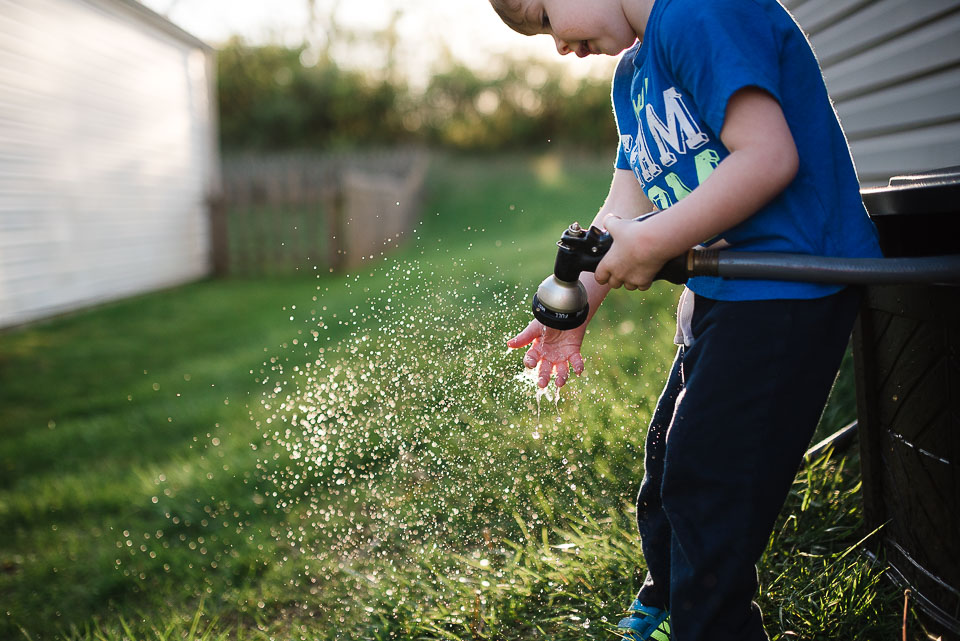
Just grab a exposure brush and go over the parts that you want to increase.
For this photo, I used an exposure brush over the entire center of the photo.
This helped keep some shadows while emphasizing light in the main part of the photo (the little boy’s hands), which is why it can be such an effective tool for utilizing.
The same method can be used for graduated and radial filters.
I used the same exposure adjustments and applied an inverted radio filter in the middle of the photo.
The results are nearly identical, but using a radial filter gives you a more even distribution than a brush ever will. But, it mostly just boils down to preference.
It’s obvious to see that you can get various results from various exposure methods.
Just keep in mind that every photo you edit might need a different approach, so it’s good to know the different ways that you can adjust your images in Lightroom.
If you found these tips helpful, here are some more resources that you might enjoy:
New to Lightroom presets? Get started with this step-by-step guide and download this FREE starter pack.
What’s your editing style? Here are 5 Lightroom editing styles that you can easily replicate.
Getting started with Lightroom: These are the best import settings that you should be choosing.


be the first to comment